Reason: This is a problem in the manufacturing process, and the new version has eliminated this issue.
Solution: After locking the screw slightly, use a tool to heat the screw, and then screw in.
原因:這是製造過程上的問題,新版1.5已經排除這個問題.
解法:將螺絲稍微鎖上後,使用工具加熱螺絲,再鎖入.
Reason: It is normal for the hole of the hook piece to be tight, so as not to fall off during operation.
Solution: Heat the rivet after inserting it, and press it in hard to expand the hole, so that you can get the proper tightness.
原因:勾片本身緊是正常的,防止運作過程脫落.
解法:將鉚釘插上後加熱,再用力壓入進行擴孔,這樣子可以得到適當的鬆緊度.
Reason: the surface is not smooth enough.
Solution: sand the surface and add slicon oil.
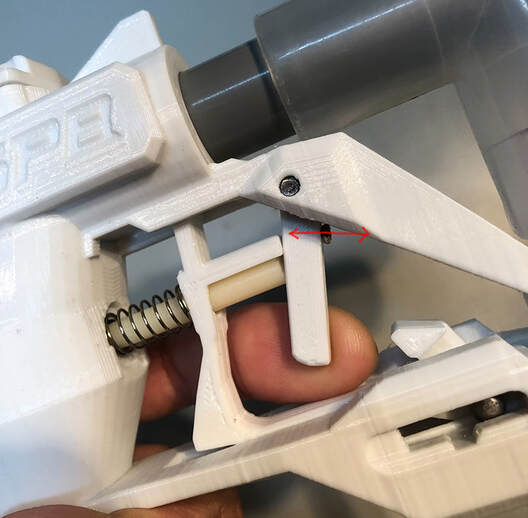
Reason: The lever angle needs to be adjusted.
Solution: Adjust the screw on the lever(Fig.3) so that the lever is 90 degrees.
原因:表面不夠光滑
解法:處理表面,上油
原因:槓桿角度過大
解法:調整槓桿上的螺絲,讓槓桿與blaster呈現90度
The trigger rod is too long, resulting in air leakage when it is pressed to the valve,
Reason: This is a subtle difference.
It is designed to be adjusted using the adjusting screw on the lever.(Fig.3)Total length 6.7cm
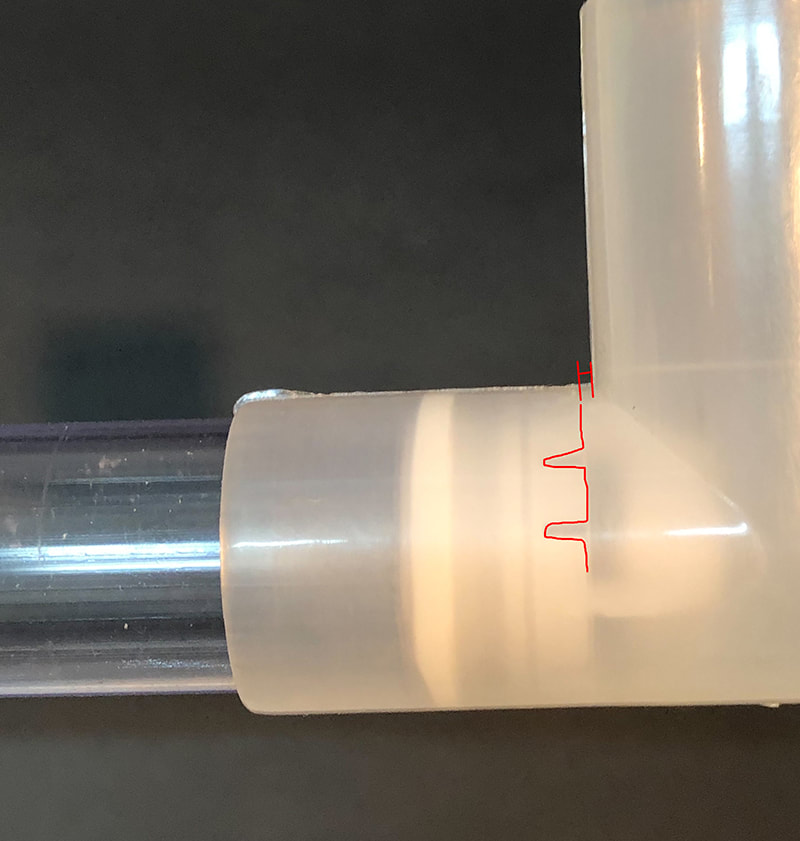
Solution: Use sandpaper to remove the length of 0.1CM from the trigger rod. (Fig.4)
觸發棒太長,導致觸壓到閥門漏氣.
原因: 這是個細微的差異. 在設計上是可以利用於槓桿上的調節螺絲(Fig.3)進行調整.
解法: 使用砂紙,將去觸發棒除掉0.1CM的長度.(Fig.4) 總長6.7cm
a. Is the power of the pump effective --> .6.
b. Check for air leaks -->.7.
a.打氣筒功率是否有發揮 -->參考第六項.6.
b.檢查是否有漏氣-->.7.
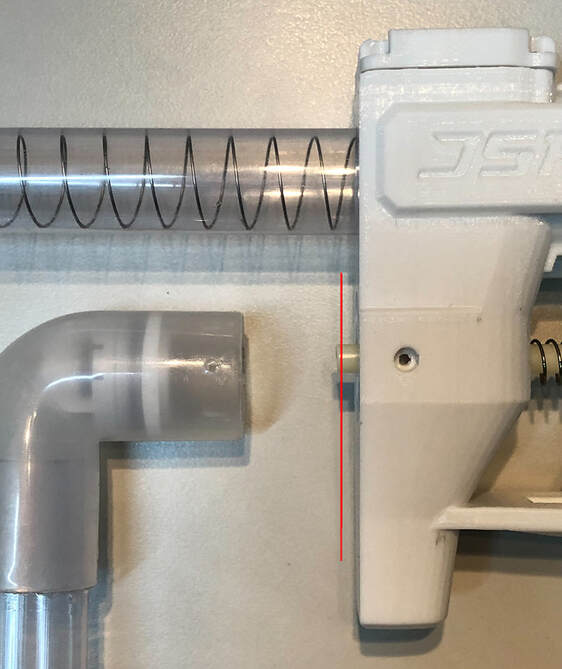
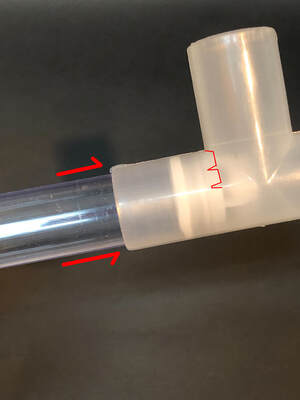
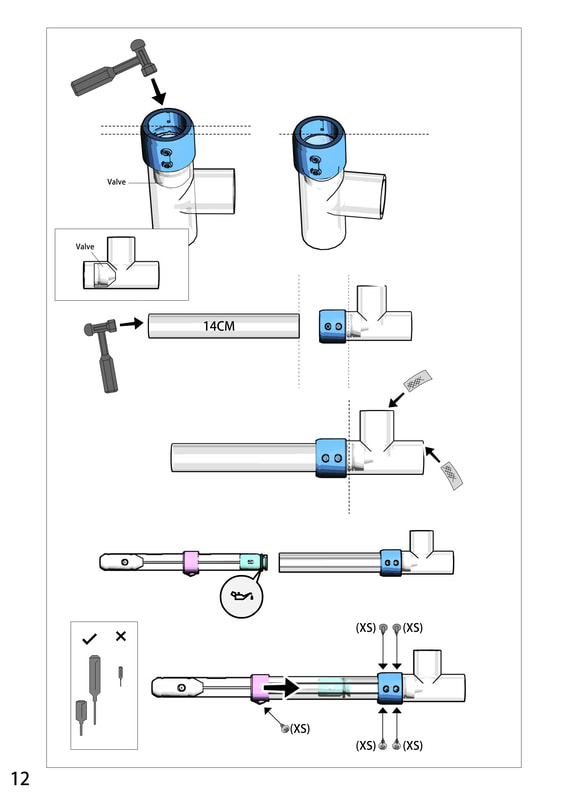
Push the pump hard into the Tee until it stops,finally, we re-attach the glue and lock the screws.
*Note-VER 1.5.1 has updated the assembly method, this step does not need to use glue, please check the following VER1.5.1 manual.
*Reinstalling the pump needs to repair the hole, because the screw has been perforated, the air will leak from the screw hole, please use a small amount of glue or tape to repair these holes.
將打氣筒用力推入接頭,直到無法繼續推進,最後我們再重新黏上膠水,鎖上螺絲.
*注意-VER 1.5.1已經更新了組裝方式,這步驟無需使用膠水,請查看下列VER1.5.1說明書.
*重新安裝打氣筒需要修補洞口,由於螺絲已經穿孔,會從螺絲孔漏氣,請利用微量膠水或是膠布修補這些洞.
Inflate the blaster and soak it in water, check the position of the bubble:
a. The position of the bubble in the pump: it may be leaking from the screw hole last time when reinstalling, check --->6.
b. The position of the bubble at the air fuse: Use a hard plastic bag, because it has no elasticity, we can apply Vaseline or silicone paste to complete the airtight.
c. Bubbles at the connection position of the hose: it may pull the hose, causing the parts to crack, and glue can be used to fill the surrounding area.
d. Bubbles on the periphery of the hose: Glue can be used to fill the surrounding area.
e. Valve tilt
Disassemble until the air valve can be seen, adjust the air valve manually, if it cannot be adjusted, try to press the valve and inflate until the air valve pushes outward, pay attention! It will pop out, do not look directly at the air valve.
a. 泡泡於打氣筒的位置:有可能是重新安裝的時候,從上一次的螺絲孔洩漏,查看--->6.
b.泡泡於空氣保險絲的位置: 選用較硬的塑膠袋,由於沒有彈性,我們可以塗上凡士林或是矽膏完成氣密.
c.泡泡於軟管連接位置: 有可能拉扯到軟管,導致零件裂開,可使用膠水填充周圍.
d.泡泡於軟管外圍位置: 可使用膠水填充周圍.
e. 氣閥歪掉: 導正氣閥,拆開到可以看見氣閥,手動調整氣閥,如果無法調整,試著按壓閥門並且打氣,直到閥向外推進,注意!它會彈出來,請勿直視著氣閥.

 RSS Feed

